Engagement Party Dress
I sewed my dress for the engagement party using a Vintage Vogue dress pattern (V2903). LOVE IT!!! It's great for twirling :)
Centerpieces
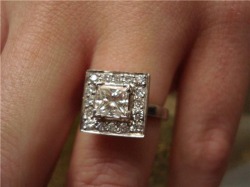
My engagement ring and inspiration for our centerpiece!
Josh designed the ring himself and the design has a very special meaning. Josh says he fell in love with me the night of our first kiss, July 3, 2008. If you add those digits, you get 18. There are 18 diamonds other than the main rock; 16 surrounding the main and one on either side in the crown.
Now you see one of the reasons I love this man so much!!!
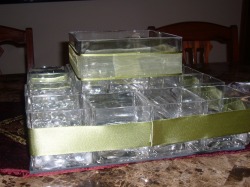
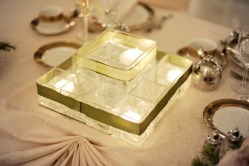
All the glass cubes looked too much like a giant ice cube, or like an '80'sish centerpiece, so I wanted to soften it up and give it some color. I found 2 moss colored ribbons at JoAnn's that I like, one solid and one sheer with a border.
For the sheer ribbon, I cut it to wrap around the 6" cube. I adhered the one end to the glass with 2 Zots and secured the other end with 4 Zots (I wanted extra security for this end, since Zots aren't really meant to adhere fabric to fabric). This will be completed on all the 6" cubes prior to the wedding day.
For the solid ribbon, I folded one side and placed a 1" strip of adhesive velcro on it. I wrapped the ribbon around the cubes as tight as I could and stuck the other side of the adhesive velcro onto the other side of the ribbon. I think it all looked really clean and tailored in the end. The velcroed ribbon should be easy to affix on the day of the wedding... I hope!
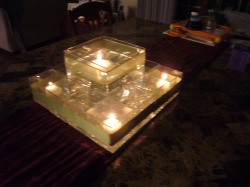
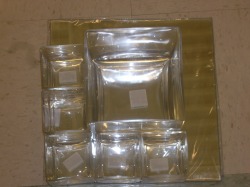
At JoAnn Fabrics, we found 3" cube votives and 6" cube votives and then put a square mirror underneath to reflect the light better. Starting to look like my ring!
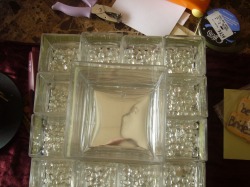
We put small clear floral pebbles in the bottoms of each of the 3" cubes (2 bags of pebbles / centerpiece).
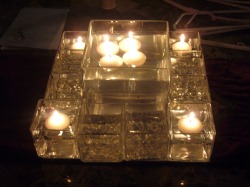
We'll have water and a large floating candle in the 6" cube (instead of the 4 small candles pictured - we don't have the big candle yet). There will be a floating candle in each of the four corners. Not sure if we'll have water in the other small ones or not. Unfortunately, our venue limits us to 5 burning candles per table since it's a historic site, otherwise I might have the whole thing blazin!
"Will You Be My ...?" Edibles
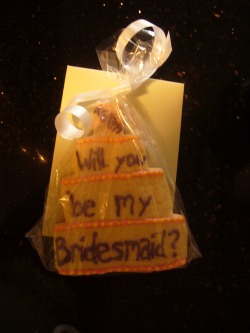
This is an example of one of the "Will you be my Bridesmaid?" cookies. I bought a wedding cake shaped cookie cutter, used my mom's famous sugar cookie recipe, and decorated each cake with icing. Each layer said:
Name,
Will you
be my
Bridesmaid / Maid of Honor?
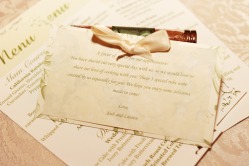
I wrapped them in plastic sandwich bags and tied the top with some ribbon. I bought sage colored cards and wrote each of them a very personal note as to how special they are to me and asking them to be in my wedding. Big hit!
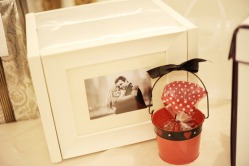
Wine Box & Love Letter Ceremony
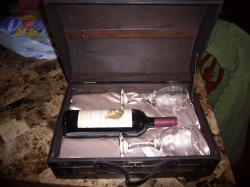
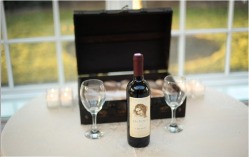
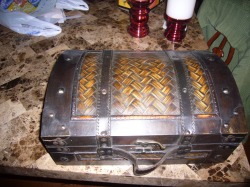

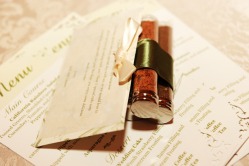
I originally heard of this idea from another Knottie but can't remember who she was. Here's one of the many articles I found describing the ceremony http://www.celebrateintimateweddings.com/lovebox.html. These are the pictures of the box we used - I bought the box for 50% off at Hobby Lobby, cut up some floral foam for the bottom of the box, carved the wine bottle and glasses into it so that nothing rolls around and breaks, and draped some ivory silk over it before nestling the bottle and glasses in. I will also etch the glasses with our names and wedding date.
We were really excited to be doing this in place of the typical Unity Candle or Sand Ceremony, since neither seemed unique or spoke to us as a couple. We both enjoy wine, but more than that, we loved that this ceremony is a continual process throughout our marriage to remind us of our committment to each other. The Priest added the love letters to the box during the ceremony. We will also put a copy of our wedding dvd in there and possibly a CD of the special songs played throughout the day. The Priest looovvvveeeedddd this idea; he thought it was so unique and loved that it continues after the wedding.
We were really excited to be doing this in place of the typical Unity Candle or Sand Ceremony, since neither seemed unique or spoke to us as a couple. We both enjoy wine, but more than that, we loved that this ceremony is a continual process throughout our marriage to remind us of our committment to each other. The Priest added the love letters to the box during the ceremony. We will also put a copy of our wedding dvd in there and possibly a CD of the special songs played throughout the day. The Priest looovvvveeeedddd this idea; he thought it was so unique and loved that it continues after the wedding.
Shower Hostess Gift
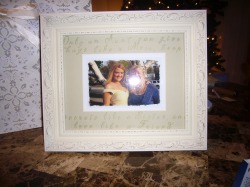
My Aunt threw my amazing bridal shower at her home, so I wanted to do something very special for her. In addition to a gift certificate to a local spa that we've gone to together, I bought this picture frame and customized the mat. I used clear stamps and a metallic green ink to write: Only an Aunt can give hugs like a Mom, keep secrets like a Sister, and love like a Friend." She absolutely loved it and started crying, which I think means it was a job well done!
Card Box

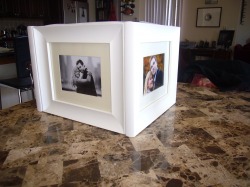
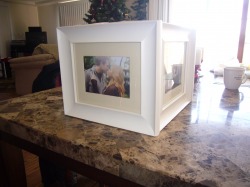
We used the guide from Road to the Aisle. It was pretty simple and straightforward. The only thing we did differently is to use landscape photos instead of the portrait photos I've seen everyone else use. No real reason, we just liked those photos better from our e-session. It worked out completely fine and I'm very pleased!
Favors
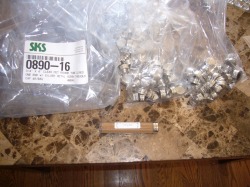
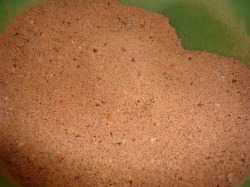
We purchased ~ 400 plastic vials with screwtops from SKS and filled them with 3 different spice rubs that Josh created. We labeled them SUGAR (a brown sugar, coffee, and spice rub for hams and porks), SPICE (a spicy mix of chili powders and other spices for beef, chicken, or vegetables), and EVERYTHING NICE (a mild blend for poultry, seafood, fish, and veggies). We tied the trios together and gave one to each couple. The idea to do the 3 vials came from The Inspired Bride who filled the vials with Hot Coca for a winter wedding (SOOO CUTE!). I designed and printed labels using return address labels from an office supply store. We printed out Thank You tags that explains what each rub is and suggested uses. We used plain ivory paper and then used photo corners to stick them on the same patterned paper we used for the programs (all of the paper was cut down to about 3x5). It was a huge success that keeps giving - we are constantly getting texts from guests saying they used one of the rubs and loved it and asking us if we have any extras.
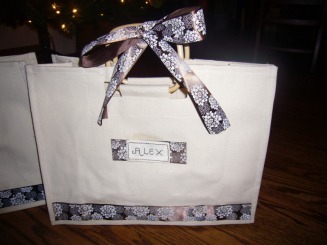
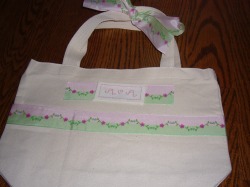
Bridesmaid's / Flower Girl's Tote Bags
I bought plain canvas totes with bamboo handles from Hobby Lobby ($7 each). I found this great floral ribbon at JoAnn's that came in a bunch of different colors, and lucky for me all the favorite colors of each of my BMs. So I used binding sheets to attach the ribbon to the totes as a border on the bottom and then as a backdrop for the name plates. I cross-stiched each of their names in the colors that correspond with their ribbons, folded over the sides of the fabric, and bound that to the ribbon. I just tied the excess ribbon onto the handle. It was a bit time consuming, but they look so cute and it was well worth it. FI saw them and said they look so professional that I should go into business with them.
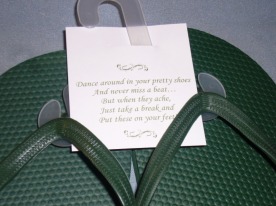
Green flip flops. I found the phrase from another Knottie's dancing shoes basket, but I can't remember whose! It says:
Dance around in your pretty shoes
And never miss a beat....
But when they ache
Just take a break and
Put these on your feet!
Dance around in your pretty shoes
And never miss a beat....
But when they ache
Just take a break and
Put these on your feet!
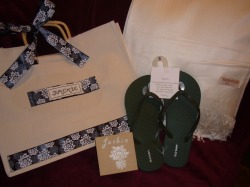
The tote bag, ivory pashmina, flip flops, and jewelry box (which I stamped with each girl's name and the florish I used on the invites in a metallic sage green ink).
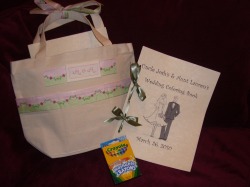
Flowergirl's tote with the coloring book I made. I also bought some toys for her to play with at the dinner table (a mini etch a sketch and stuffed Sponge Bob).
The Coloring Book word doc:
The Coloring Book word doc:
| coloring_book.doc |
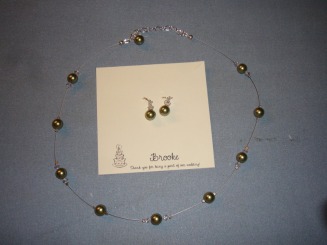
Earring and necklace set I had made from Etsy seller KarinAllie. She customizes each earring card to say the BM's name and "Thank you for being a part of our wedding!"
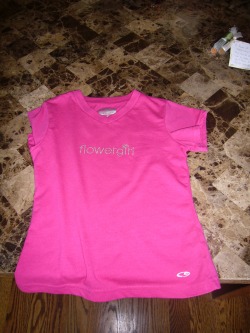
Flowergirl Tshirt. I cheated on this one due to lack of time and bought the iron on from Joann's
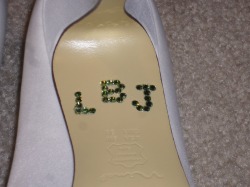
Shoes!

They're Nina's Fulvia shoe that I got at DSW and they simply make me drool. I can't stop looking at them.
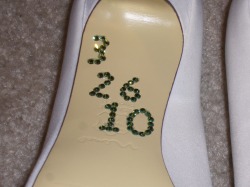
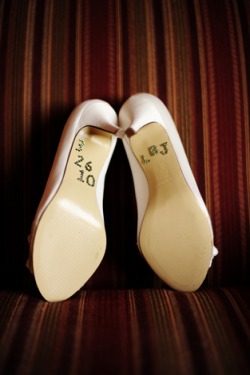
I just printed out the text, laid the paper flat and put the rhinestones over the letters, pressed clear packing tape over the rhinestones to keep them in place, flipped it over, applied jewel glue to the back, and stuck it on the shoe. I let it dry over night before removing the tape.
Sounds kind of complicated when I type it out, but it's really simple and effective. I've used the method on everything from tshirts, tote bags, and now shoes!
Sounds kind of complicated when I type it out, but it's really simple and effective. I've used the method on everything from tshirts, tote bags, and now shoes!
Escort Card Board
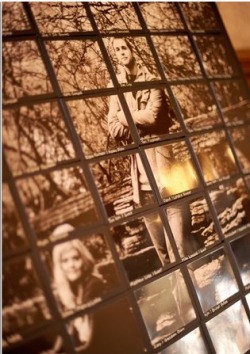
We loved what JanuaryBride did with her Chicago Skyline escort board and wanted to do something similar. We loved a picture from our engagement session, but I was really worried that having people in the picture may not work out so well. I was wrong. It ended up looking great and all of the guests raved over how unique it was. The project itself was time consuming and precise, but not too difficult and definitely well worth it.
Ring Bearer Pillow
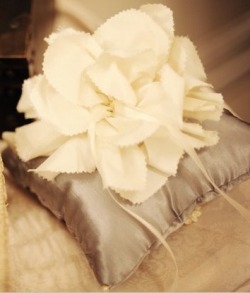
I came across the silk flower pilllow on Martha Stewart's webiste and loved it. I bought sage green silk shantung, sewed it into a square, and stuffed it. I used crinkle edge scissors to cut out the ivory silk dupioni into petals and gathered them together per Martha's instructions. Tied an ivory ribbon to the center of the flower to hold the rings in place and TA DA!
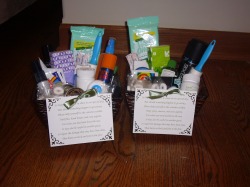
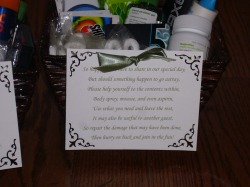
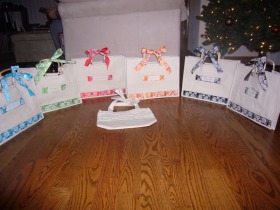
Toiletries Baskets